Microsoft Dynamics: Add Goava’s company dashboard using an iframe solution
Microsoft Dynamics: Add Goava’s company dashboard using an iframe solution
Enrich your Dynamics CRM by adding a company dashboard from Goava on your accounts and leads.
Goava’s company dashboards are the quickest way to get a 360 view of your prospects and customers making sure you come well prepared for meetings and calls. This is what it could look like when you’re done:
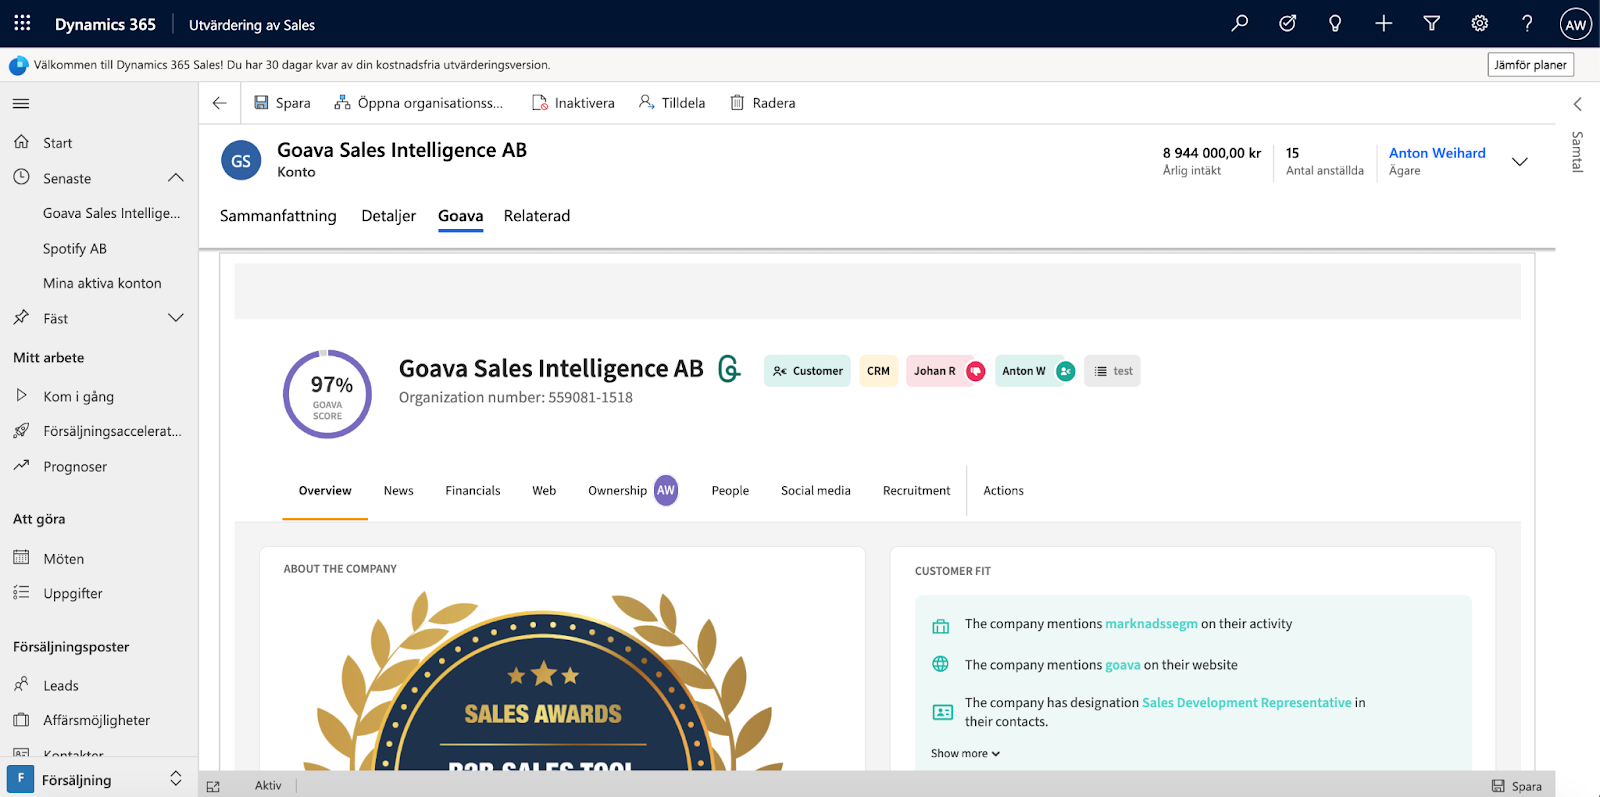
Let us walk you through one of the ways this can be set up.
Remember that the code is case-sensitive. Keep that in mind when editing the code.
-
Start by going to Settings -> Customizations and select ”Customize the System”.


2. From the left navigation bar, select Components -> Entities -> Account ->Forms.
Double click the Account on this list to add the element to the Accounts view or any other view you’d like to use. In this example, we’ll use the Sales Insights view.
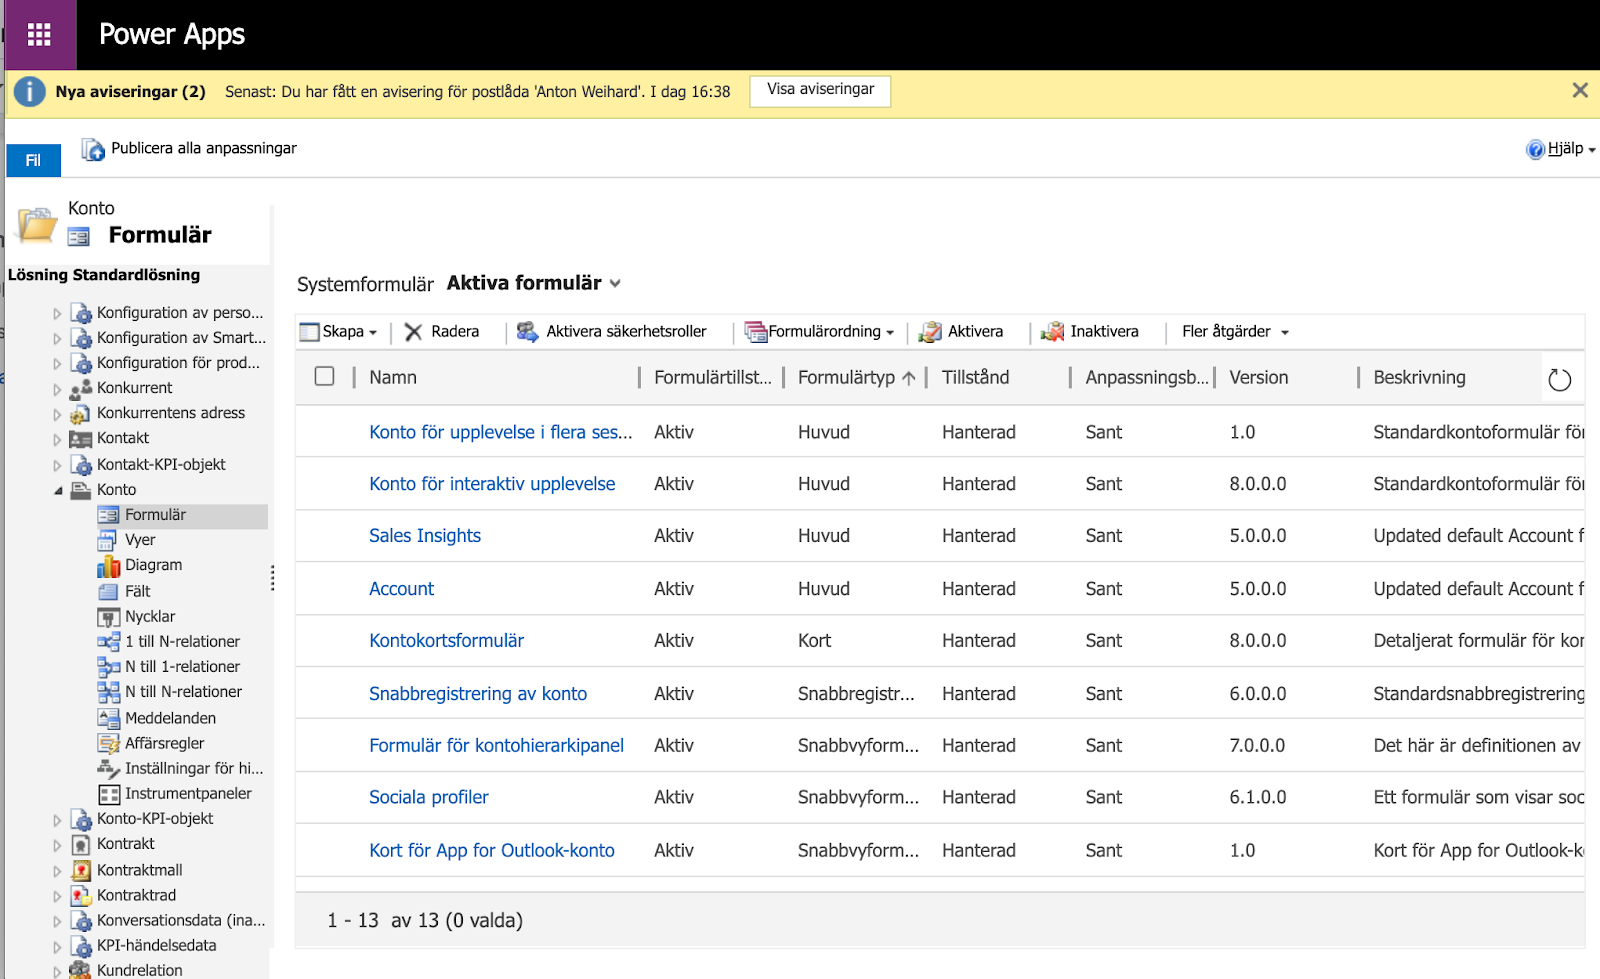
3. When you are in the Account View you will be able to create a Column for Goava Dashboard. Select Insert -> One Column. The column should be visible in the center of the page. Click on the empty section inside the new Column and on top Insert IFRAME.
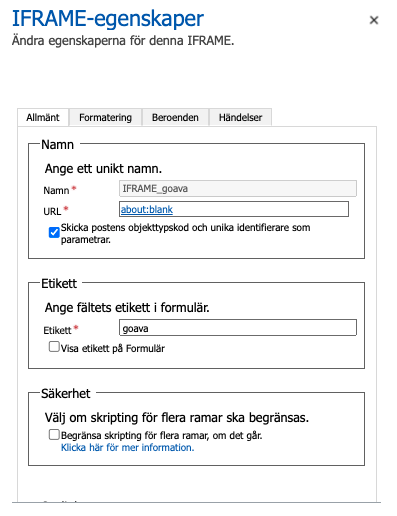
4. Give the IFRAME property a name, in this example, it is called ”IFRAME_goava”. Add a name to the label as well, for example, Goava, Add about:blank to the URL section. Make sure you don't have "Restrict cross-frame scripting" selected. Make a note of what you named the IFRAME, you'll need this name later.
5. Add formatting settings as you prefer however we suggest using around 20-30 rows as height. Add Row layout to expand automatically. Enable ALWAYS scrolling for the IFRAME.
6. Click on OK to save IFRAME. After you have saved IFRAME double click the Column again and you should see the events section. You should now add a Form Library. Click the green plus icon to add new. Click ”New” again, then ”Web resources” and a new window will open.
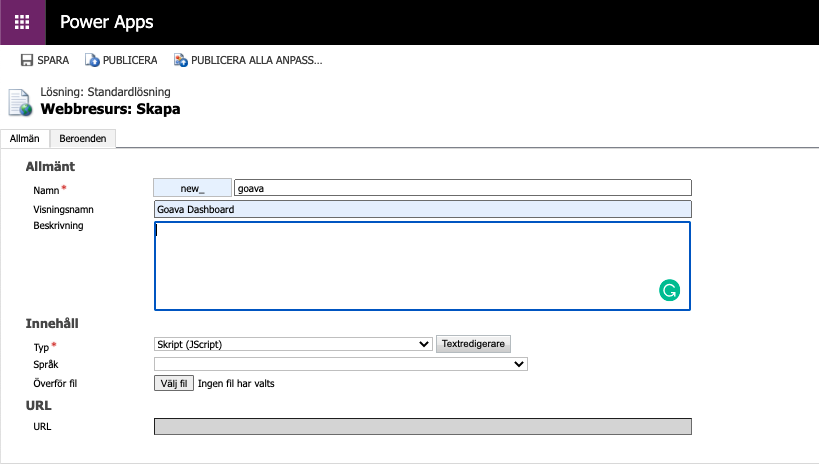
7. For this part you need to know the API-name of the field where you store organization number/CVR-number/business ID for your accounts. In the script below we call it new_organizationnumber, but you should replace this with the correct name for your Dynamics environment. Same thing goes for the iframe name, in this example we previously named it IFRAME_goava but if you gave it another name that also needs to be replaced.
Create a name for Web resource, add Display Name and Description. For Content you select Script and paste the script below to the Text Editor. Remember that the code is case-sensitive. Click on OK and Publish.
function changeURL(executionContext)
{
var formContext = executionContext.getFormContext(); // get formContext
var business_id = formContext.getAttribute("new_organizationnumber").getValue();
var IFrame = formContext.ui.controls.get("IFRAME_goava");
var goava_url = "https://discover.goava.com/companies/" + business_id + "?showAll";
IFrame.setSrc(goava_url);
}
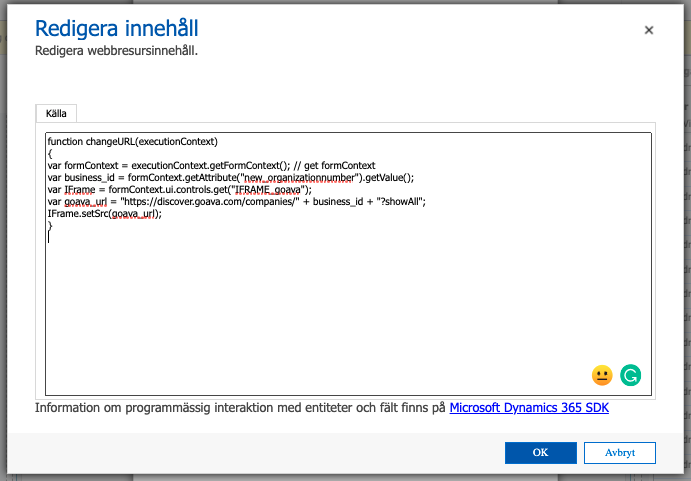
8. In the Lookup Records window; Add the newly created resource and you can then close this window.
9. When you have closed the web resource window you should have the Events tab open. Scroll down to the Event Handlers section, press the green Add to add a Web resource. Create a New one. Select the correct library you just created and write the name of the function "changeURL" to the Function section. Select "Pass execution context as first parameter". Click OK.
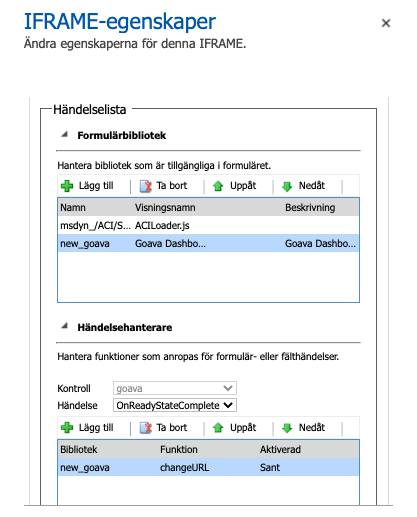
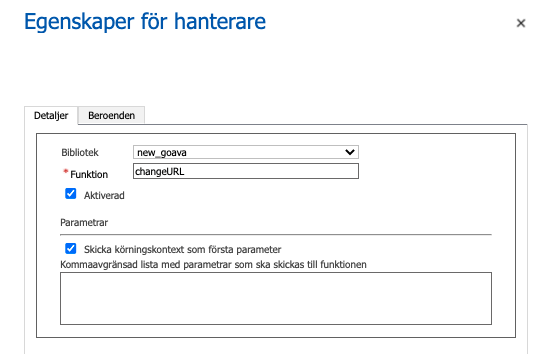
Save and publish the changes. You’re done!
More documentation on iframes in Dynamics can be found here: https://docs.microsoft.com/en-us/dynamics365/customer-engagement/developer/use-iframe-and-web-resource-controls-on-a-form