
Create a new segment
Step 1: Start a new segment
From the Goava home page, click New Segment (1). You can also open the segment list in the left sidebar and click the + icon at the top.
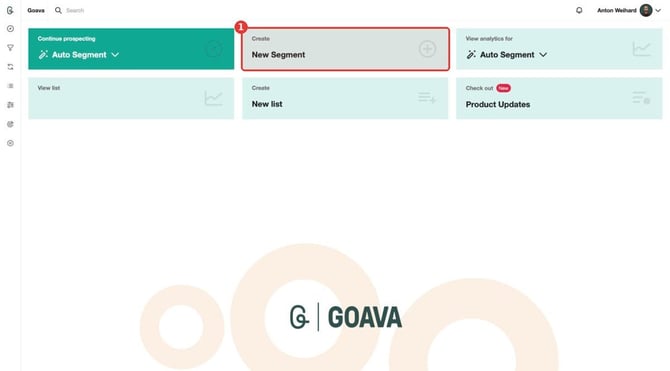 Click New Segment on the home page.
Step 2: Add your first filter
In the segment builder, click Add filter (1). A menu lists the filter categories (2): Company, Industry, Location, Employees, Revenue, Payment Capacity, Equity, Assets, Result, Goava Score, Web, Technographics, Contacts, Team, Recruitment, News and Qualification Criteria.
Read about all filters in this article here.
Not sure where to start? Suggest filters (next to Add filter) proposes filters for you.
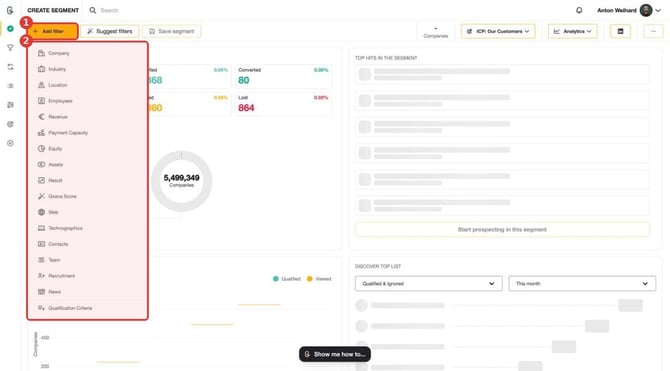 Add filter opens the list of filter categories.
Step 3: Set the filter values
Each filter opens in its own panel. For example, with Location you search for a region, municipality or town in the search box (1), or browse the dropdown, which starts at country level. Turn on Include all workplaces (2) to match companies that have an office in the area, not only those with their head office there.
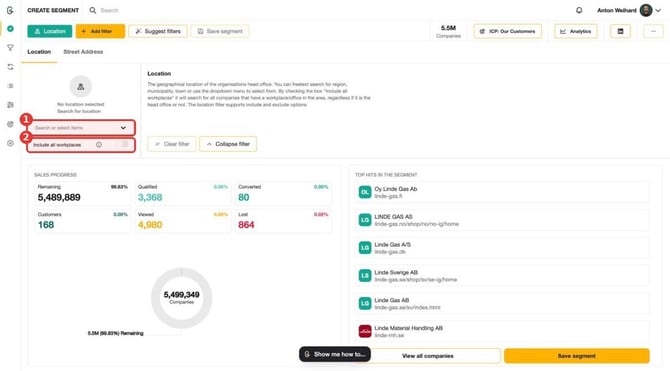 The Location filter: search box and "Include all workplaces".
Pick a result to add it. Selected items appear as a chip (1). Click the circle icon on the chip (2) to switch between including and excluding it, or the x to remove it. The company count at the top and the dashboard below update immediately.
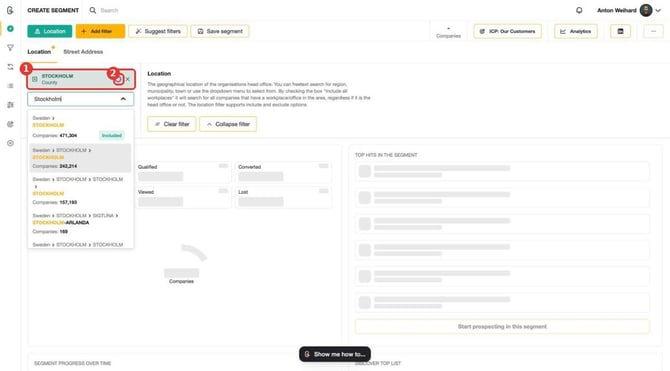 Stockholm county added as an included location.
Step 4: Combine several filters
Click Add filter again to stack more filters; all of them apply together. Every active filter gets a button in the toolbar so you can reopen it later. A dot on a filter tab means that tab has a value set.
Numeric filters such as Employees show a distribution chart. Type a range in the two boxes (1) or drag the handles (2). Here we use 10 to 200 employees.
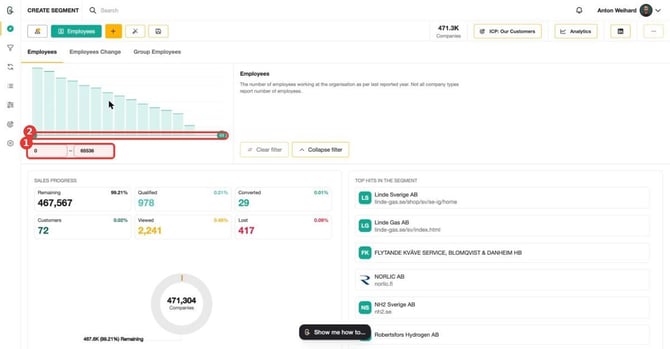 The Employees filter with a range of 10 to 200.
Step 5: Save the segment
Click the Save segment button in the toolbar (it is the disk icon once filters take up the space). In the dialog:
- Segment name (1): give it a clear name.
- Share with (2): Private, Team, Coworker or Everyone.
- Prospecting/Signal Agent (3): switch on to let the agent find qualified companies in the segment and deliver them to your lists or CRM. Leave it off if you only want to browse manually.
- Default View (4): which view opens when you click the segment (for example Dashboard).
- Click Save (5).
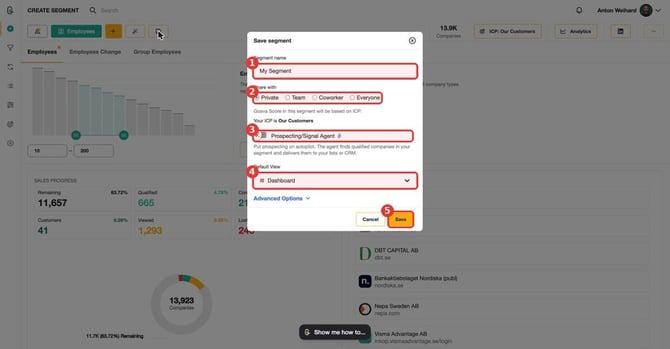 The Save segment dialog.
Optional: Advanced options
Expand Advanced Options in the dialog to choose what happens to companies you act on. The Positive outcome (1) is where good prospects land; it defaults to Qualified, and if your CRM is connected and you choose Qualified they are also exported to your CRM. The Negative outcome (2) is where companies that do not fit go; it defaults to Ignored, which keeps your qualified list clean while letting you review what was evaluated.
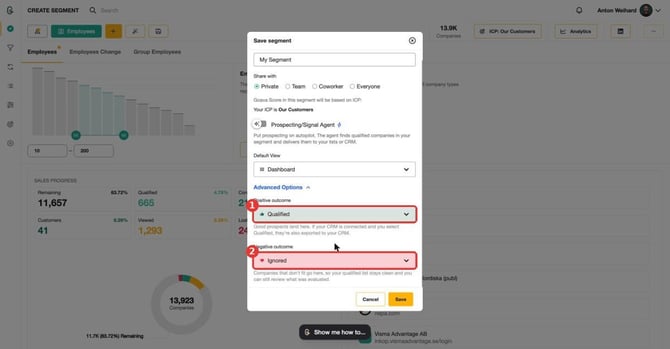 Positive and negative outcome settings.
After saving, the segment opens on its own page and appears in your segment list. Note that Goava also applies some default exclusions to a saved segment (for example companies already in certain lists and existing customers), so the count may be slightly lower than what you saw while building it.
Update or change an existing segment
Step 1: Open the segment
Click the compass icon in the left sidebar (1) to open the segment list. The + at the top (2) creates a new segment. Scroll to the segment you want and click its name (1 in the next picture). Avoid the small x that appears when you hover over a segment: it removes the segment.
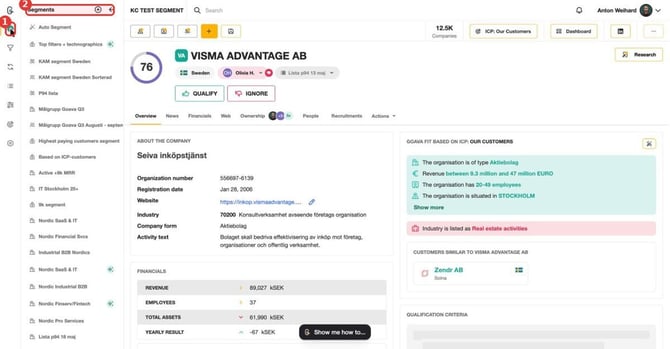 The segment list in the sidebar.
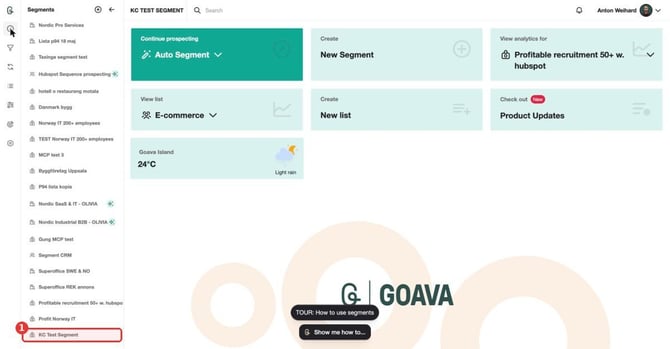 Click the segment name to open it.
Step 2: Edit the filters
The segment's filters are shown as buttons in the toolbar (1). Click one to reopen it, then change the values (2), for example widening the employee range from 10-200 to 10-500. Use + to add a new filter, Clear filter to empty a filter, or the small x on a filter button to remove it from the segment. The counts update as you edit, but nothing is stored until you save.
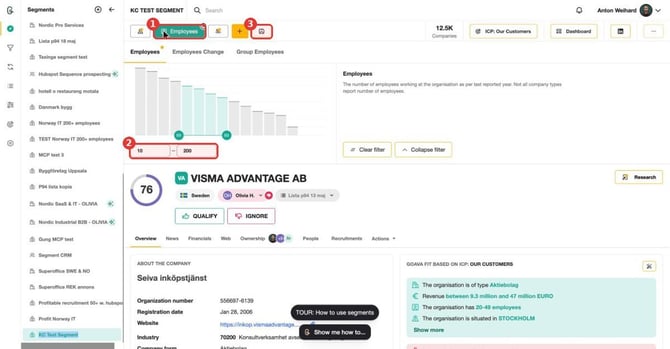 Edit a filter, then click the save icon (3).
Step 3: Save your changes
Click the save icon in the toolbar (3). The dialog is now called Update segment. You can also change the name, sharing, agent and default view here. Then choose:
- Update (1): overwrite the existing segment with your changes.
- Save as new (2): keep the original as it is and store your changes as a separate segment. Useful for variants.
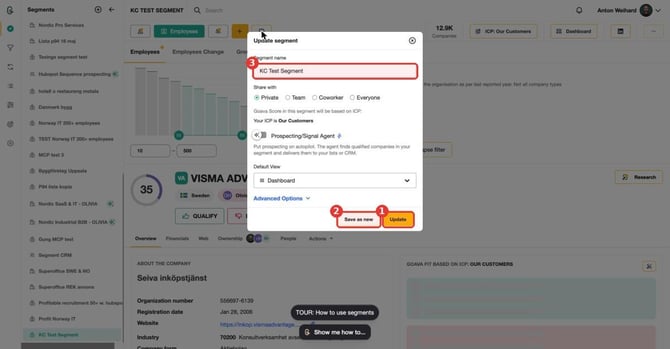 The Update segment dialog with Update and Save as new.